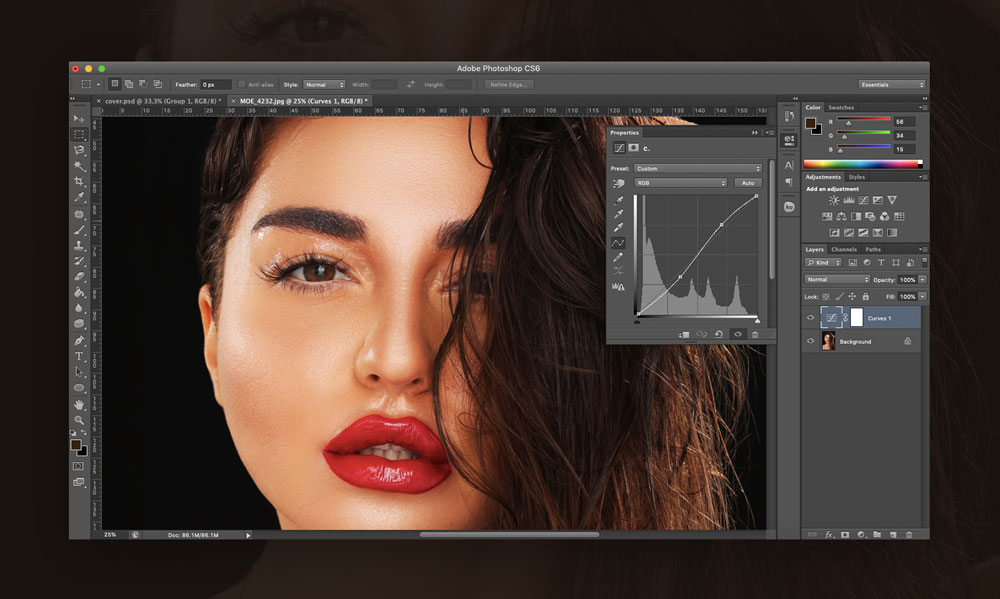
“Post-Processing Secrets: Retouching in Fitness Photography”
In fitness photography, post-processing plays a vital role in enhancing the aesthetics of your images and highlighting the subject’s dedication and hard-earned physique. Retouching, when done thoughtfully, can take your fitness photos to the next level. In this blog, we’ll uncover the post-processing secrets that can help you achieve professional-looking results in fitness photography.
1. Start with RAW Files:
Begin your post-processing journey by working with RAW files. These files retain all the information captured by your camera sensor and provide greater flexibility in editing. You’ll have more control over exposure, colors, and details.
2. Correct Exposure and White Balance:
Ensure that your image is properly exposed and that the white balance is accurate. Adjust the exposure to balance highlights and shadows, and correct any color casts to achieve natural-looking skin tones.
3. Enhance Contrast and Clarity:
Carefully adjust the contrast and clarity to make the subject’s physique stand out. Increasing contrast can emphasize muscle definition, while a subtle boost in clarity can add depth to the image.
4. Dodge and Burn Techniques:
Dodge and burn tools allow you to selectively lighten or darken specific areas of your image. Use them to accentuate muscle definition, sculpt shadows, and enhance the subject’s form. A soft brush with reduced opacity is ideal for creating natural-looking results.
5. Skin Retouching:
Retouching the subject’s skin is a delicate task. Use tools like the healing brush, spot healing brush, or clone stamp to remove blemishes, scars, or imperfections. Be cautious not to over-retouch, as maintaining a natural look is crucial in fitness photography.
6. Highlight Muscle Definition:
To emphasize muscle definition, consider using targeted adjustments like the adjustment brush or gradient filters. These tools allow you to enhance specific areas, such as biceps, abs, or quads, without affecting the entire image.
7. Color Grading:
Experiment with color grading techniques to create a unique look for your images. Adjust the color balance, saturation, and vibrance to achieve the desired mood and style. Color grading can help convey the intensity and energy of the fitness scene.
8. Sharpening and Noise Reduction:
Apply selective sharpening to enhance the crispness of the image, particularly on edges and details like veins or sweat droplets. Use noise reduction to smoothen any noise that may have been introduced during editing.
9. Consider Black and White:
Black and white conversions can be powerful in fitness photography. They emphasize form, contrast, and texture, making the subject’s physique the central focus. Experiment with different black and white presets to find the style that suits your image.
10. Maintain Realism:
While retouching can significantly enhance an image, it’s crucial to maintain realism and authenticity. Avoid excessive retouching that leads to an unnatural look. Fitness photography should inspire and motivate viewers by showcasing achievable results.
11. Before and After Shots:
Consider creating a before-and-after visual to showcase the transformation from the original image to the final retouched version. This can help clients and viewers appreciate the impact of your post-processing work.
12. Consistency in Editing Style:
Develop a consistent editing style that aligns with your brand and personal aesthetic. A cohesive editing style across your portfolio can help build recognition and trust among clients and followers.
Post-processing is an essential part of creating stunning fitness photos that highlight the dedication, strength, and determination of your subjects. By following these retouching secrets and practicing regularly, you can refine your skills and elevate your fitness photography to a professional level. Remember to always prioritize realism and authenticity in your edits, as these qualities resonate most with your audience in the world of fitness photography.
You may also like
Location, Location, Location: Finding the Perfect Backdrops for Fitness Photography
“Innovations in Fitness Photography: Trends and Technologies to Watch”
Recent Posts
- Fitness Photography and the Rise of Artificial Intelligence: A Synergistic Future
- “Innovations in Fitness Photography: Trends and Technologies to Watch”
- “The Ethics of Retouching: Balancing Realism and Artistry in Fitness Photography”
- “The Impact of Colors and Wardrobe Choices in Fitness Photography”
- “Challenges and Solutions: Overcoming Common Issues in Fitness Photography”

